No need to stress if your external hard drive shows up as "read-only" on your Mac. Here, you'll find 7 dependable solutions to help you get rid of this issue. These methods will make your Mac's external hard drive readable again. Choose any solutions below to fix the Mac external hard drive read only error.
Understanding the Mac External Hard Drive Read Only Error
User Query: I have always used the same Seagate external drive with my MacBook Pro for years, but today my MacBook ran out of juice, and the external drive was attached to it. I charged it and turned it on, and now the external is read only, and I can’t figure out what to do. Any tips?
Source: Reddit
The real-life scenario described above involves a user encountering a read-only error on their Mac computer. In this case, the Seagate external drive became read-only after the user's MacBook Pro experienced a battery depletion. This situation can be attributed to several potential factors. However, it's crucial to note that not all users might experience the same issue, as the reasons can vary based on individual MacBook setups.
Before delving into solutions, it's essential to grasp the underlying causes behind the "Read Only" error. Below are some common reasons that can lead to read-only errors on external hard drives connected to Mac computers.
- USB Port Issues: Faulty USB ports or connectors might hinder proper communication, leading to read-only access.
- Driver Compatibility: Incompatibility between the external drive's drivers and the macOS version could cause read-only access.
- File System Corruption: Sudden power loss disrupts data management, resulting in a read-only state.
- NTFS File System: NTFS-formatted drives face limited macOS write support, leading to read-only access on your MacBook.
- Permission Settings: Incorrect or corrupted permissions can cause restricted access, manifesting as a read-only problem.
- Formatting Errors: Power loss or corruption can trigger drive formatting errors, activating a protective read-only mode.
- Failed Hard Drive: Physical or logical issues with the drive's hardware can result in read-only access.
7 Methods To Fix Mac External Hard Drive Read Only Error
Below we have added 7 tried and tested methods to solve the MacBook external hard drive read only error on macOS. But it is important to note that a few of these methods might result in data loss. Therefore, we strongly advise you to prioritize retrieving the data from your external hard drive beforehand to prevent potential data loss.
Initial Step: Recover Your Data Before Troubleshooting
In cases where your storage device turns read-only, you're usually still able to retrieve files from it. Even if you can't see all your stored data, there is a solution which is Remo Recover Mac, a professional data recovery tool designed for recovering data from various storage devices, including your external hard drive, with read-only error.
Remo Recover Mac is advanced software that helps you effortlessly retrieve photos, videos, audio, documents, and more from various storage devices on your Mac computer. Trusted for its excellence, Remo Recover Mac tackles complex data loss scenarios using sophisticated algorithms.
Moreover, you can experience the convenience of previewing your data before restoration, all without any cost. Whether you're using the latest macOS, Ventura, or any other version, Download this tool now and follow the below-mentioned steps to recover your data.
Steps to Recover Data From Mac External Hard Drive With Read Only Error
- Launch the Remo Recover Mac software on your macOS computer.
- Connect the affected external hard drive showing read-only errors to your computer.
- Select the "Recover Volumes/Drives" option within the software.
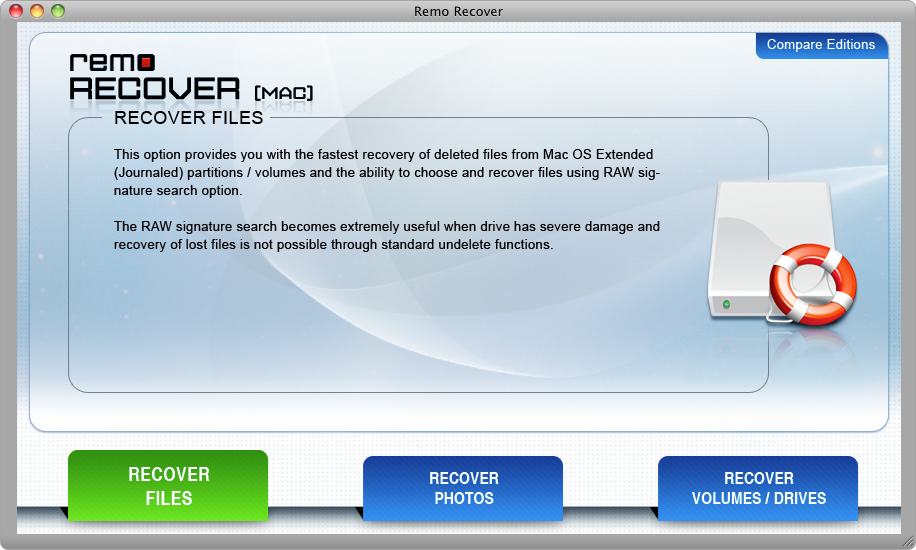
- Choose the external hard drive that is encountering the read-only error and proceed by clicking "Next."

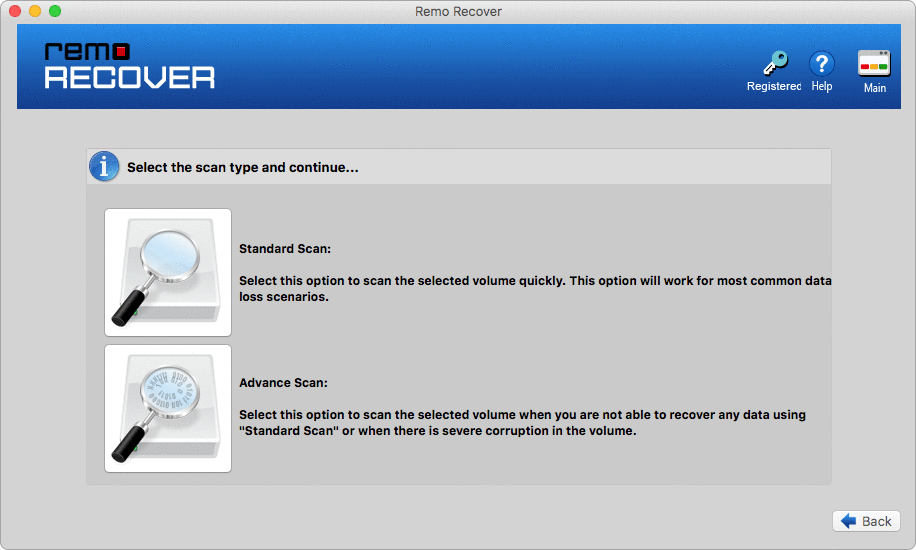
- Opt for the "Advance Scan" feature and wait while the software performs the data recovery process.
- After the recovery process is complete, you'll be able to view a preview of the retrieved files, including photos and videos.
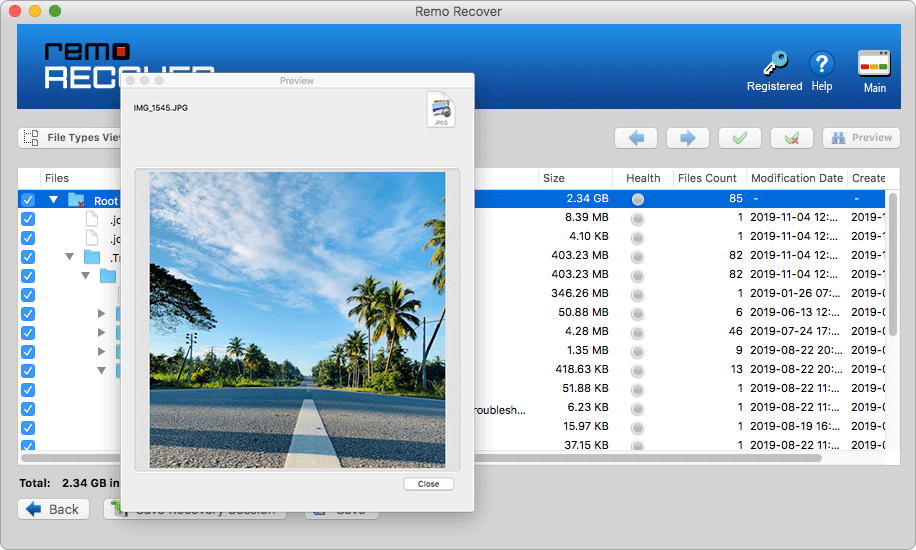
- Identify and select the files you want to recover from the external hard drive.
- Click the "Save" button to save the recovered files to a desired location.
Once you have successfully exported and secured your critical files, proceed with the following solutions to resolve the Mac external hard drive read only error.
Method 1: Verify the USB Port
If your external drive is acting up, start by checking the USB connection. A faulty port might be causing the read-only issue. Here's what to do:
- Disconnect the drive from the current USB port.
- Try connecting it to a different USB port on your computer.
- If available, attempt connecting the drive to another computer to check if the issue persists.
Method 2: Driver Compatibility Check
Sometimes, outdated or incompatible drivers can be the culprit behind read-only access. To ensure smooth operation, follow these steps:
- Visit the website of your external hard drive brand and check for any driver updates for your drive model.
- Download and install the latest drivers compatible with your macOS version.
- After updating the drivers, restart your computer and test the drive's functionality.
Method 3: Run Disk Utility
Running Disk Utility can help fix file system issues that might be causing the read-only error on your Macbook. Follow the below simple steps to run the disk utility:
- Open "Disk Utility" from your Applications > Utilities folder.
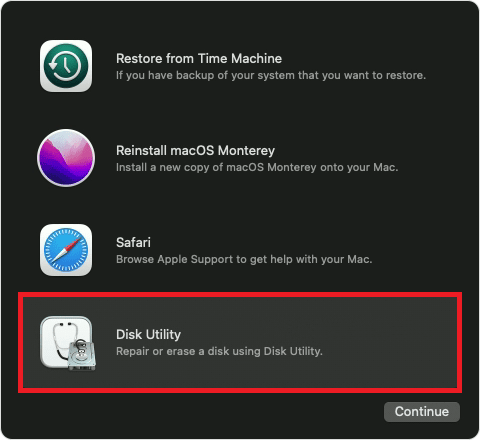
- Select your external drive from the left sidebar.
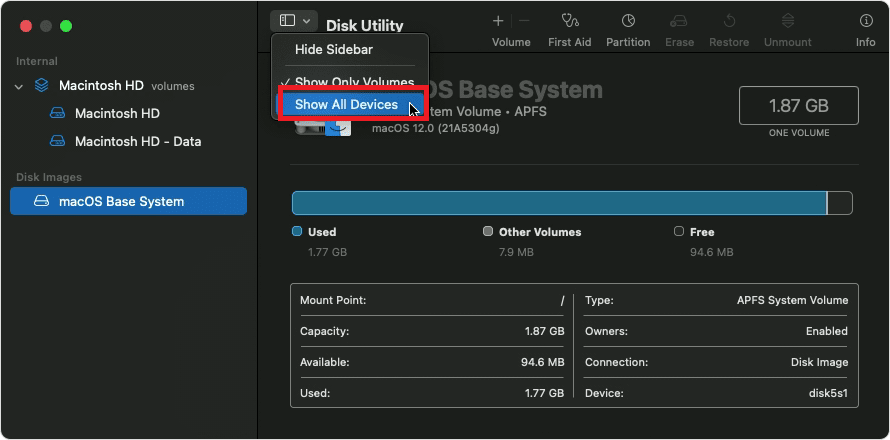
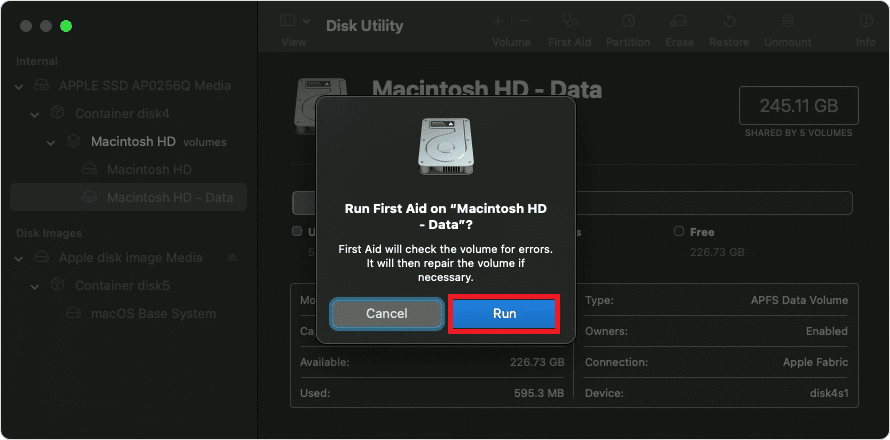
- Click "First Aid" and "Run" to check and repair disk errors.
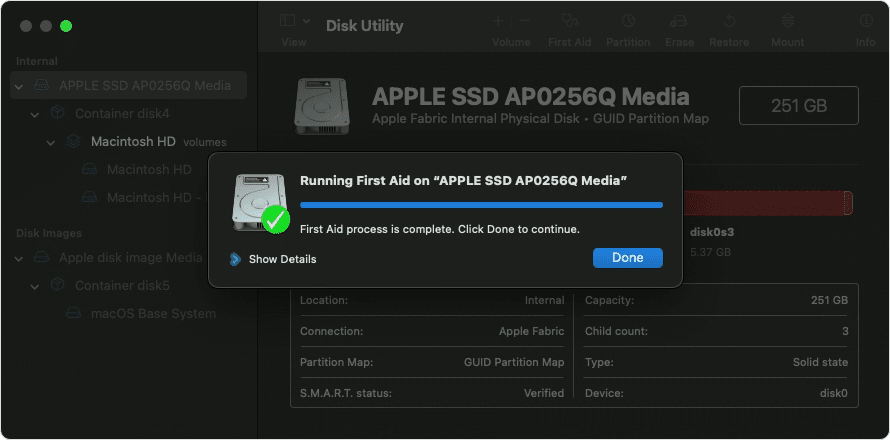
- After the process is complete, check if the read-only issue is resolved.
Method 4: Adjust Sharing & Permissions
Incorrect sharing and permissions settings can lead to read-only access. Follow these steps to adjust them:
- Right-click on your external drive and select "Get Info."
- Expand the "Sharing & Permissions" section.
- Click the lock icon, enter your administrator password, and click the "+" button to add your user account.
- Adjust the privilege settings to "Read & Write" for your user account.
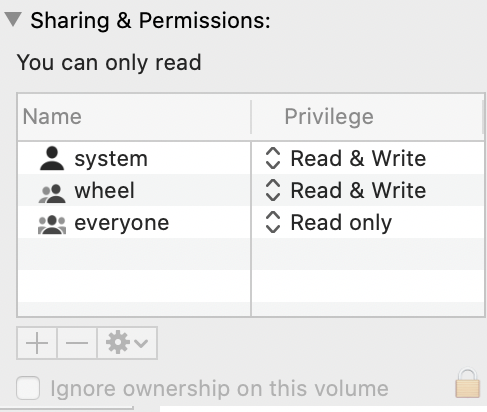
- Click the gear icon and choose "Apply to enclosed items" to update all files and folder permissions.

Method 5: Reformat the External Hard Drive
If other methods don't work, reformatting the drive might help. Keep in mind that this will erase all data on the drive, so back up or recover your important files using Remo Recover before proceeding:
- Open "Disk Utility" from your Applications > Utilities folder.
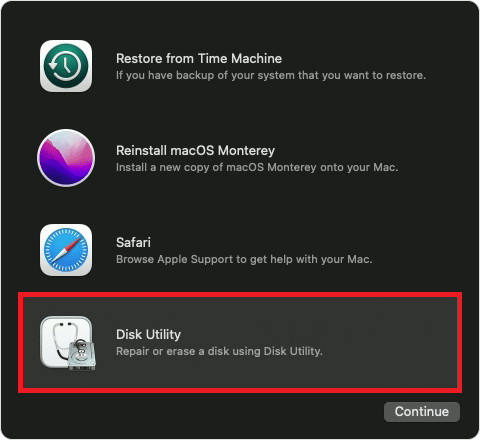
- Select your external drive from the left sidebar.
- Click "Erase" and choose a new file system format.
Note: Choose APFS, HFS+, or exFAT as your file system formats. These are the ones that work well with Apple devices.
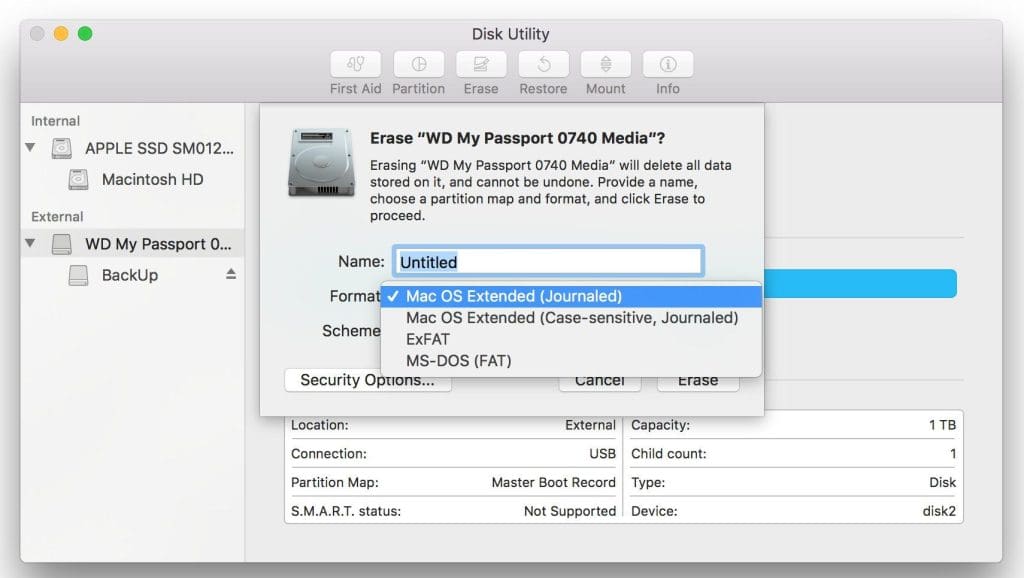
- Give the drive a name and click "Erase" to reformat it.
- After reformatting, restore your backed-up files and check if the read-only issue is resolved.
Method 6: Enable NTFS Write Support via Terminal
Terminal, Mac's command line tool, can be a powerful ally for adjusting system settings. Using it to enable NTFS Write support is possible and can be quite handy. If you're comfortable using Terminal, follow these steps:
- Find "Applications" in Finder's left panel, then head into the "Utilities" folder and launch "Terminal" in a new window.
- Use the following command to edit the fstab file and enter your admin account info and password when prompted.
sudo nano /etc/fstab

- Execute this command in Terminal, replacing "DISKNAME" with your external hard drive's name:
LABEL=DISKNAME none ntfs rw,auto,nobrowse
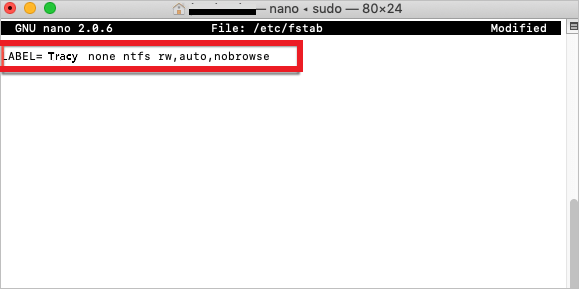
- Unplug and reconnect your external hard drive. You can now use it without read-only limits.
Method 7: Check Drive Health
If none of the above methods work, the issue might be due to physical or logical problems with the drive. In such cases, you need to check the hard drive's health as soon as possible.
If your hard drive is failing, move your important files to another device if you can access your files. Or you can always use the best external hard drive recovery tool like Remo Recover to recover data from a failing hard drive, which can help safeguard your data in advance. Remember, taking action early can save your important data from being lost forever.
Conclusion
Encountering the Mac external hard drive "Read Only" error can be frustrating, but with these seven methods, you can easily regain control over your external storage. Remember to adjust sharing and permissions, check and repair disk errors, remount the drive, and use Terminal commands if necessary. By following these steps, you'll be back to accessing and modifying your files without any further issues.