Did you delete or lose extremely important data from your MacBook Air/Pro or iMac? This article will provide you with all the vital information you need to know about MacBook data recovery.
The thought of losing important work files, such as reports, Powerpoint presentations, documents, Excel spreadsheets, etc., is enough to give some of us sleepless nights. Yet data loss is a very common issue; thousands and thousands of MacBook users across the globe encounter data loss situations every day.
Mentioned here are some of the most common solutions, including Undo file deletion, Mac Trash, Backups, Time Machine, and a specialized Data Recovery tool for Mac to help you recover files from any MacBook or iMac.
So without wasting any more time, let's start the MacBook data recovery process.
How to Recover Deleted Data from MacBook Pro, MacBook Air, or iMac?
Starting the article with the simplest solutions.
- Recover Files from MacBook Using Undo Option
- Recover Files From MacBook Trash
- Restore MacBook Files from External Backup
- Restore Macbook Files from Time Machine Backup
- Recover MacBook Files Using a Powerful MacBook Data Recovery Software
Method 1: Recover Accidentally Deleted Files From MacBook Using the Undo File Deletion Option
The undo file deletion option is one of the least known solutions for recovering deleted files on Mac.
This option helps you revert the last action, bringing back any accidentally deleted files and folders from any location in your MacBook.
How to Undo Accidentally Deleted Files on MacBook?
Navigate to the folder from where you have deleted or lost your MacBook files. Hit the Ctrl and Z Keys at the same time.
The deleted files will be restored upon completion of the task.
If the undo file action did not yield any positive results, then worry not you can try finding the deleted files in the Trash Bin folder of your MacBook.
Method 2: Recover MacBook Files From Mac Trash
The Trash folder in your MacBook or iMac is where all your deleted files and folders will reside for a certain period before getting permanently deleted.
How to Restore Deleted Files from Trash Folder of MacBook?
- Go to the Trash Folder.
- A list of all the files residing in the Trash bin will be displayed on your screen.
- Select the files you want to recover, right-click, and click on the Put Back option from the menu bar.

- The files will be restored back to their original location.
If you could not find the deleted MacBook file in the Trash Bin. You might have deleted them permanently.
Suppose you have deleted files from the Mac Trash. Then, refer to this article on how to recover deleted Mac trash files.
Method 3: Restore MacBook Files from External Backup
Backups are undoubtedly one of the best ways to ensure the safety of your important MackBook files.
In case you have encountered data loss from any storage devices and any version of Mac OS, as well as any MacBook or iMac.You can always restore and use the backup data if you lose your original files.
You can refer to this article to find out how to backup entire computer to an External Hard drive.
Method 4: MacBook File Recovery Using Time Machine Backup
Time Machine is one of the best ways to take automatic and regular backups of entire MacBooks.
If you have a Time Machine Backup that contains all the required MacBook data. You can try restoring MacBook data from the backup.
1: Search for the Time Machine utility in the Spotlight.
2: Find the appropriate version of the backup which contains the data that you are looking for.
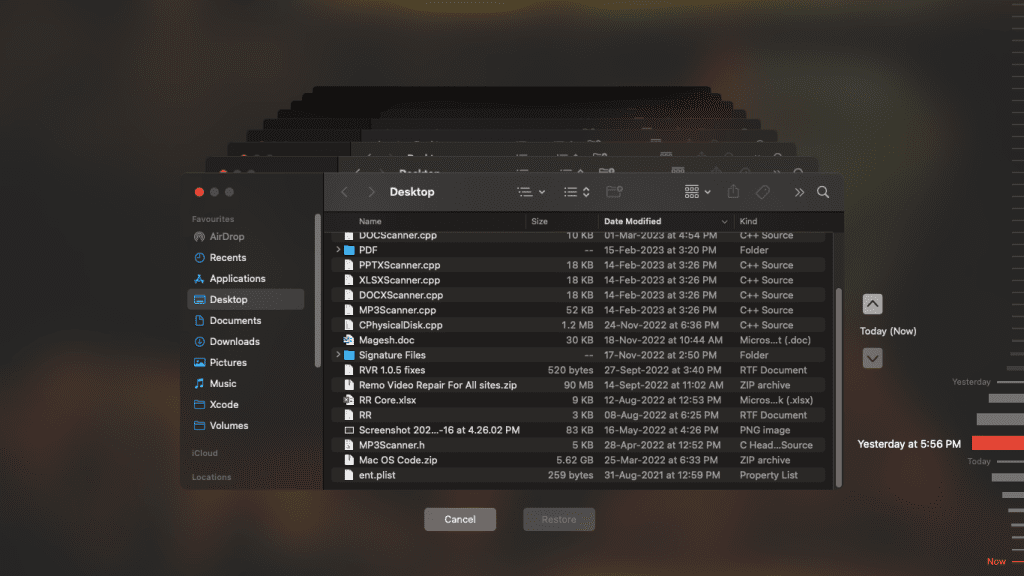
3: Hit the Restore button.
The MacBook data that was deleted earlier will get restored back.
If you do not have any backups and your files were deleted permanently. Then try the next solution, which is proven to recover permanently deleted files from internal drives and external storage devices.
Method 5: MacBook Data Recovery using Remo Mac File Recovery Software
Remo Mac File Recovery Software’s user interface aims at streamlining and simplifying the complex data recovery process. Engineered with effective scan algorithms, the tool ensures recovery of every bit of deleted data from the Mac volumes. These two features make Remo Mac Data Recovery Software one of the industry's highly trusted data recovery utilities.
Download the tool and start the Mac data recovery process now.
5 Simple Steps for a Flawless MacBook Data Recovery Experience
1: Launch Remo Mac File Recovery Software, and from the home screen, Select Volume and click on Scan.
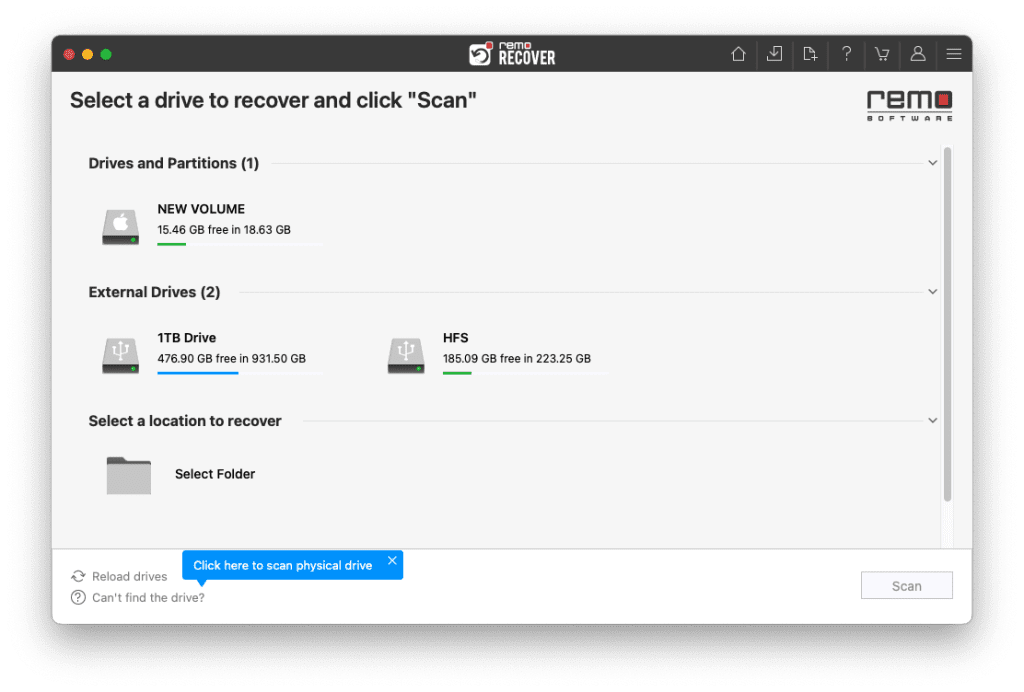
2: Click on Dynamic Recovery View to view the data as they are being recovered from the Macbook.
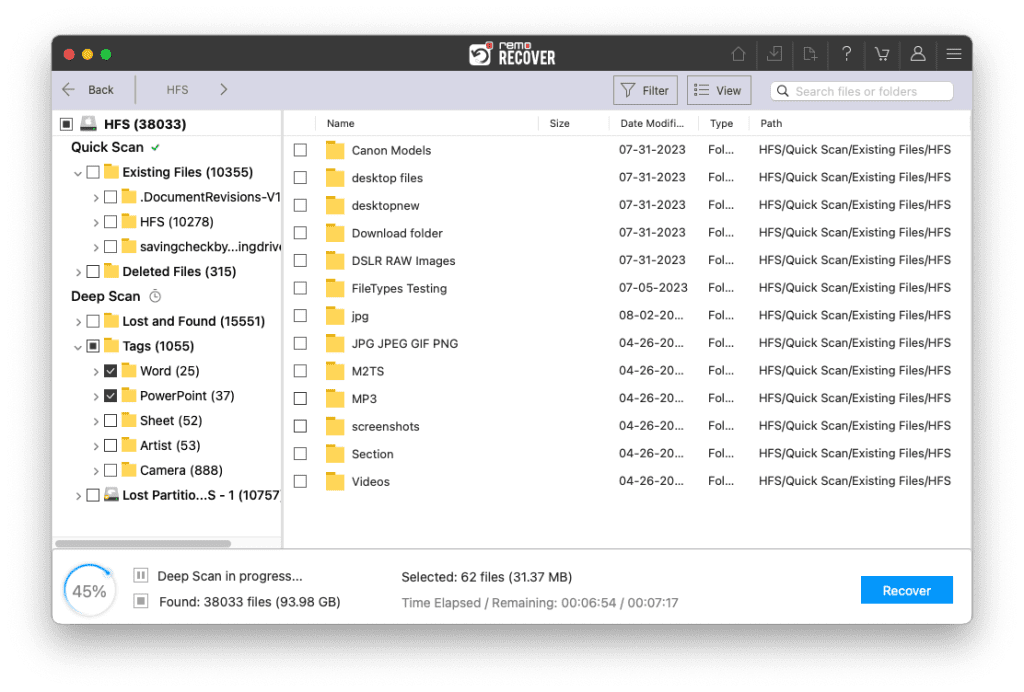
3: You can sort the specific files or folders using the Search bar.
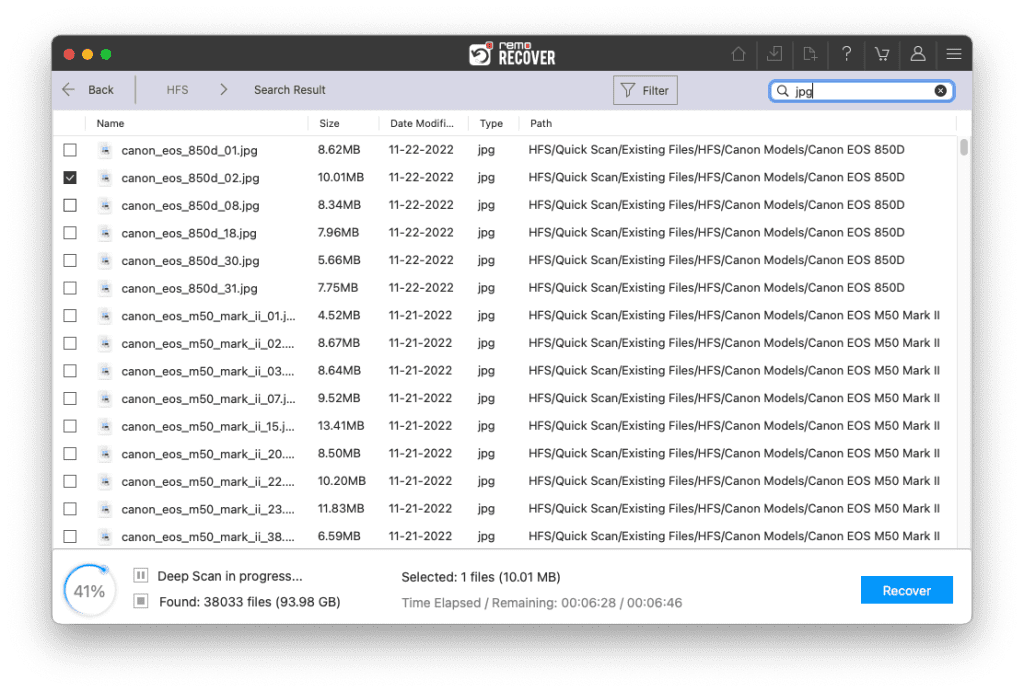
4: Double-click to preview the recovered data from Mac.

5: If you are satisfied with the preview of the recovered data just click on Recover to save the file in your preferred location.
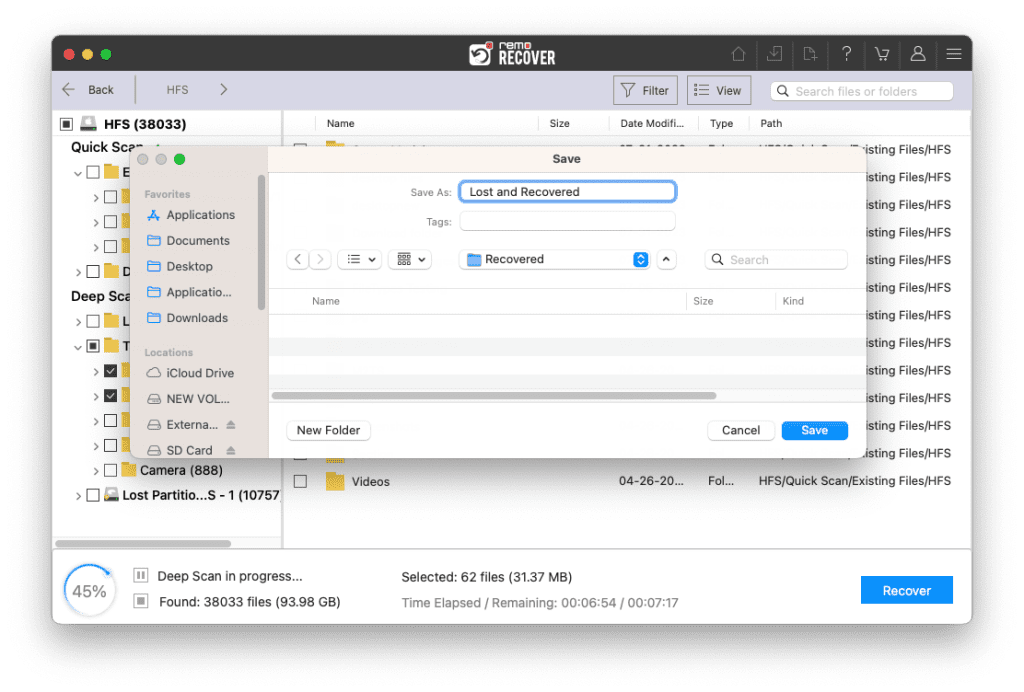
Caution: Make sure you save the recovered data in a different location from the previous one to avoid losing the data again.
One of the best things about Remo Mac File Recovery Software is it’s compatible with all the older and newer versions of macOS, including Mac Ventura, Mac Monterey, Mac Big Sur, and Catalina, as well as various other older versions.
As previously mentioned, you can also use Remo to recover data from complex data loss scenarios such as recovering data from a dead MacBook, recovering data from a broken MacBook Pro or Air, recovering data from MacBook that won’t turn on, or recovering data for MacBook that won’t boot.
Recommended read: If your MacBook has become slower or its performance is not up to the mark, We highly recommend you reset your MacBook Pro or Air.
Having Dead MacBook Air, Pro, or iMac? Read this
In this situation, your MacBook doesn’t even turn on. Unfortunately, this might be physical or hardware damage. There are numerous reasons why your Mac is not turning on; some of them are:
- Damaged battery
- Damaged power adapter
- Broken screen
- Faulty or fried motherboard
- Errors in RAM
If you fix the error successfully, you can regain access to the drive and the lost data. In all the other cases, the only way you can recover data on the MacBook is to disassemble it and retrieve the hard drive.
Later you can connect the hard drive to a healthy PC or Mac using a SATA connector and follow the same steps as mentioned earlier to recover data from a dead MacBook.
Want to Upgrade to Mac Ventura? This article will tell you how to upgrade to Mac Ventura without losing data.
Common Reasons Why MacBook Users Lose Their Data
- Accidentally or intentionally deleted files from MacBook
- Emptying Trash Bin
- MacBook or iMac that won’t boot past the Apple logo
- Dead MacBook or iMac
- Broken MacBook
- Virus or Malware attack
- Formatting of the MacBook’s internal drive or the volume
Conclusion
In this article, we have shown you how to retrieve files from a healthy MacBook Air and MacBook Pro by Undo the file deletion action, Trash bin, backups, and Time Machine Backups, as well as recovering files using a best-in-class MacBook data recovery software. We have also explained how to recover data from a dead or broken MacBook. Hope we have helped you in recovering files from your MacBook hard drive.