American hard disk drive manufacturer Maxtor has a long history in the sector. Before being acquired by Seagate in 2006, it was founded in 1982 and became the world's third-largest hard disk drive manufacturer. External hard drives from Maxtor have developed a reputation as effective storage options, especially for backups and important data.
However, internal and external hard drives are prone to different types of damage, potentially resulting in data loss. This may happen due to unintentional deletions, formatting mistakes, or unforeseen events.
The good news is that damaging your Maxtor hard drive may not necessarily mean permanent data loss. Several methods are available for data recovery, and this article will help you perform Maxtor data recovery using 6 proven methods.
What is Causing Your Maxtor Hard Drive to Fail or Lose Data?
When dealing with Maxtor hard drive issues, it is crucial to understand the root causes before performing the Maxtor hard drive recovery or repair efforts. Let's find out the most common reasons for Maxtor hard drive failures:
- Accidental Deletion: Files can be mistakenly deleted from your Maxtor hard drive. When such mishaps occur, the solution often lies in utilizing data recovery software tailored for recovering deleted files from external hard drives.
- Formatting: Formatting a Maxtor hard drive without prior backups can be a silly mistake, as it wipes out all your valuable data. Recovering data from a formatted hard drive can be a complex endeavor. Therefore, exercising extreme caution when formatting a disk or drive is essential.
- Physical Damage: One of the primary reasons behind Maxtor hard drive failures is physical damage. This can occur due to mishandling, accidental drops, or exposure to extreme temperatures. In such cases, you might need to consult data recovery services to recover data from the damaged hard drive.
- Mechanical Failures: Mechanical failures within the hard drive itself can also lead to data loss. Components like the read/write heads or spindle motor can wear out over time, causing the drive to malfunction.
- File System Corruption: File system corruption is another common culprit. This can happen due to abrupt power outages or improper shutdowns, which may leave the drive in an inconsistent state, making data recovery difficult.
- Virus and Malware Attacks: Maxtor hard drives can fall victim to virus and malware attacks like any other storage device. These malicious programs can corrupt files and even render the drive inaccessible.
- Overheating: Overheating is a significant concern for hard drives. Excessive heat can cause the external hard drive to become unreadable and eventually fail. Ensure your Maxtor drive is adequately ventilated.
Methods To Perform Maxtor Hard Drive Data Recovery
Method 1: Connect Your Maxtor Hard Drive to Another Computer
Let's commence with the simplest troubleshooting step - connecting your Maxtor hard drive to another laptop or desktop. This will help you determine whether the issue is with your computer or the drive. All you have to do is attach your Maxtor hard drive to an alternate laptop or desktop and see if it is accessible.
Note: If your hard drive is formatted as FAT32, you can connect it to an Android phone for access. However, this won't work if it's formatted as NTFS. You can refer to this article to know the difference between FAT32, exFAT, and NTFS.
Method 2: Reinstall Your Maxtor Driver
A corrupted driver can significantly disrupt your hardware's functionality. Follow these steps to reinstall the driver:
- Right-click on the Start menu and select "Disk Management."
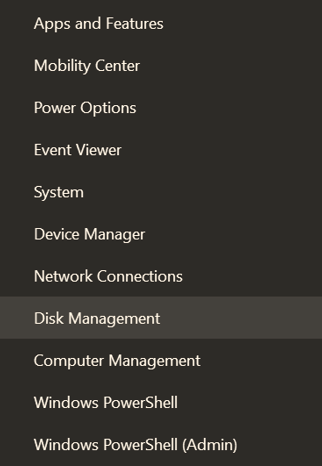
- In the Disk Management window, find your Maxtor external hard drive.
- Right-click on your external hard drive and choose "Properties." Navigate to the "Driver" tab.
- Click on "Uninstall device."
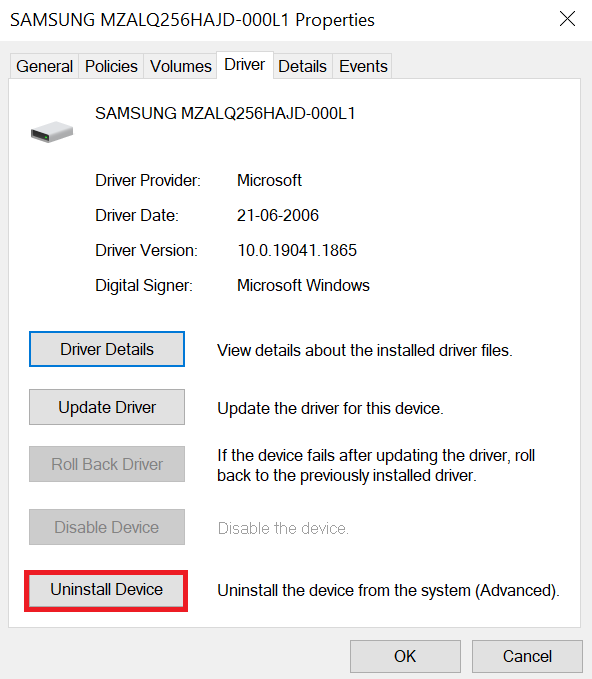
- Safely disconnect the Maxtor hard drive's USB cable, then restart your laptop, ensuring your internet connection is active.
- Reconnect your Maxtor external hard drive via USB. Windows should automatically detect and install the correct driver. If not, keep your laptop connected to the internet; Windows will eventually locate and install the appropriate driver.
Now, test your Maxtor external hard drive for functionality.
Method 3: Run the CHKDSK Tool
CHKDSK (Check Disk) is a command-line utility in all Windows versions designed to scan and repair hard drives. To employ this tool for Maxtor hard drive recovery:
- Type "CMD" in the search bar, then right-click and select "Run as administrator" to open an elevated command prompt.
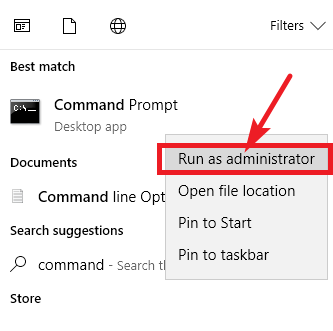
- In the command prompt, enter CHKDSK *: /f (* represents your drive letter, e.g., F:). If your drive letter is F, the command would be CHKDSK F: /f.
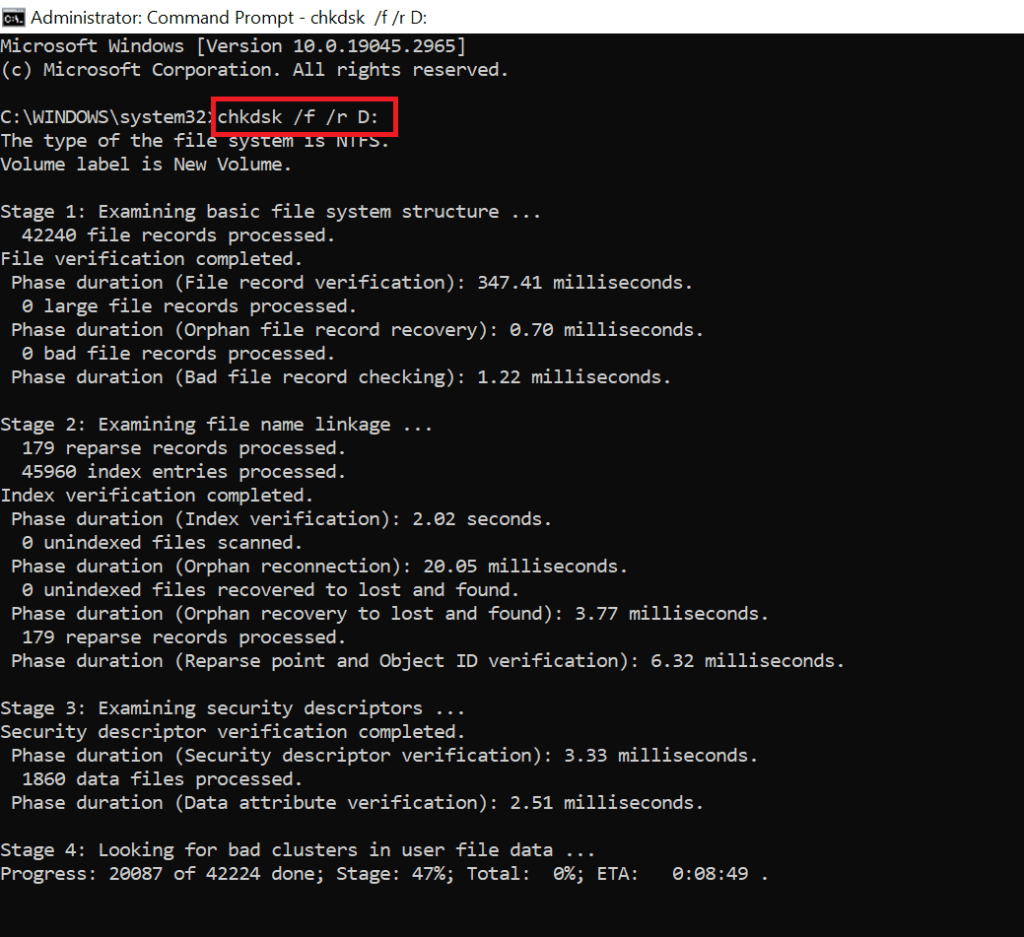
- Allow CHKDSK to complete the scan; depending on your drive's size, this may take some time.
- After completion, it may prompt you to run CHKDSK *: /r (r for repair). Follow the prompts to repair any found errors.
- Reconnect your Maxtor external hard drive and check if it's functioning correctly.
Interesting Read: How to recover files deleted by chkdsk.
Method 4: Assign or Modify the Drive Letter
A missing drive letter can throw your system into a frenzy when attempting to access your Maxtor HDD. Fortunately, you can remedy this issue by assigning or changing the existing drive letter. It's a straightforward process, and here's how you can do it in Disk Management:
- Press the Win + X keys simultaneously and select "Disk Management" from the menu.
- Locate your Maxtor hard drive in the Disk Management window.
- Right-click on your Maxtor hard drive and select the "Change Drive Letter and Paths" option.
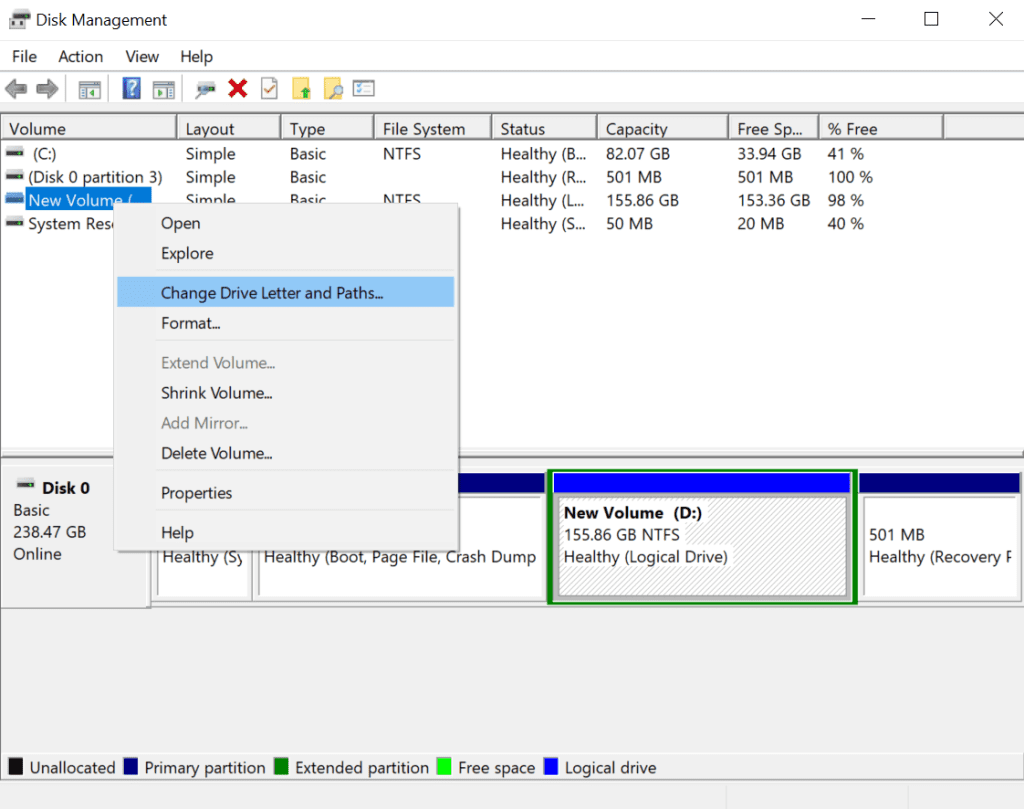
- If your external HDD already has a drive letter assigned to it and you need to modify it, click "Change." However, if no drive letter is assigned, click "Add."
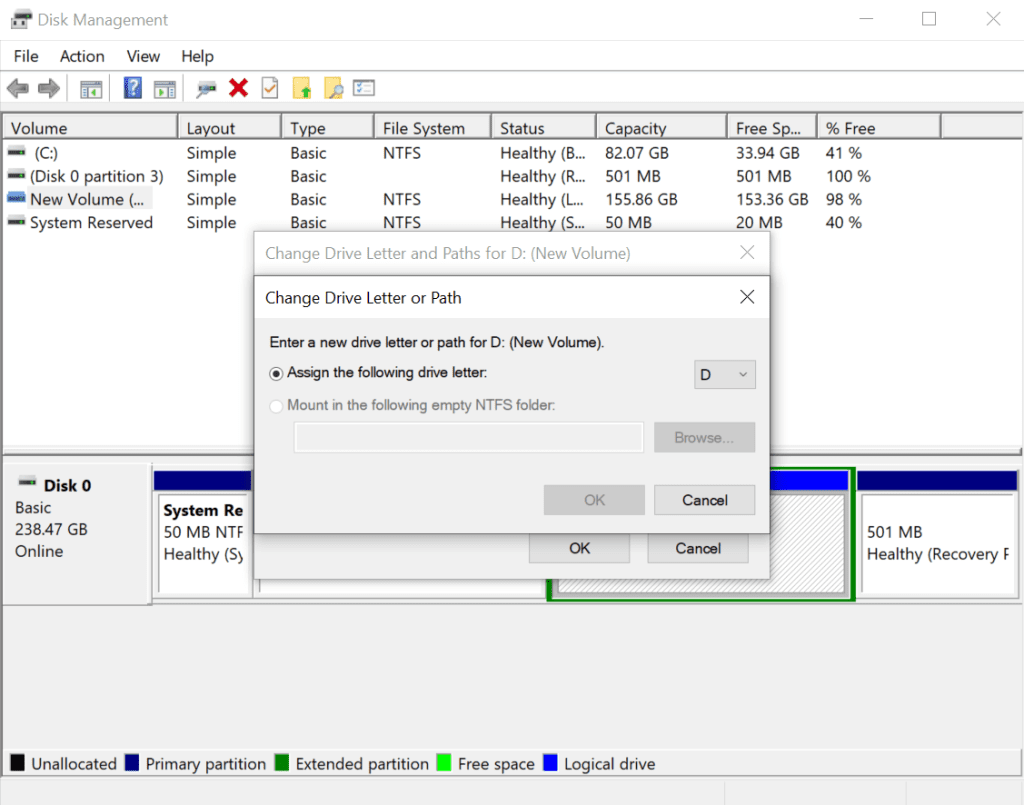
- A drop-down menu will appear; select a drive letter of your choice.
- Click "OK" to confirm your selection.
- You'll be prompted with a confirmation message. Click "Yes" to proceed.
Method 5: Use Remo Recover Software for Windows
You will need the best external hard drive recovery software like Remo Recover for effective Maxtor data recovery. This user-friendly tool can scan and recover over 500 file formats, including photos, videos, audio, Excel files, Word documents, PowerPoint files, ZIP archives, and more.
Remo Recover uses dual scan technology, allowing you to try the software for free. You can scan your drive and use features like the Dynamic Recovery View to preview your recovered files without waiting for the entire scanning process to finish. The recovery procedure is streamlined by its extra features, which include filters, advanced filters, and a search box that lets you sort and look for data based on file type or extension.
Remo has a solid reputation as a data recovery program, as the reviews support its 4.5-star rating out of 5 stars on Trustpilot. A 30-day refund policy and personalized customer support are also offered. Download the software for free and follow the below-mentioned steps:
Steps To Perform Maxtor Data Recovery Using Remo Recover Software
Follow the below simple steps to start the recovery process using Remo Recover software:
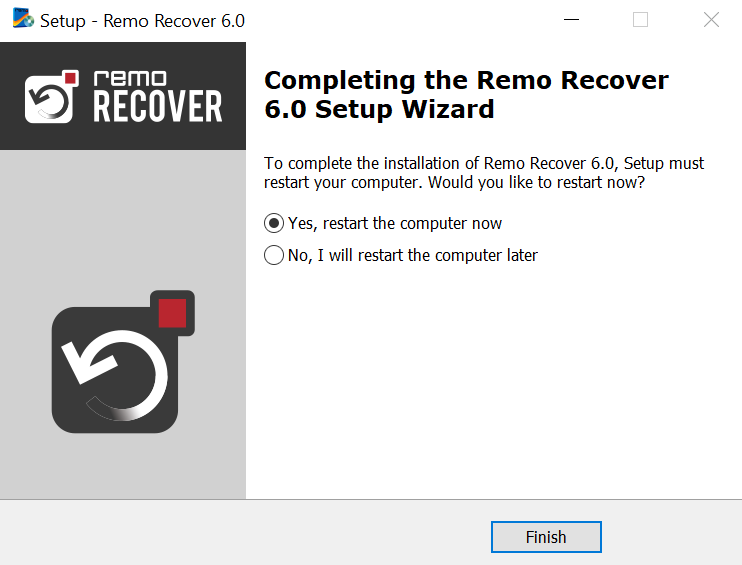
- Download and install Remo Recover Software on your Windows computer.
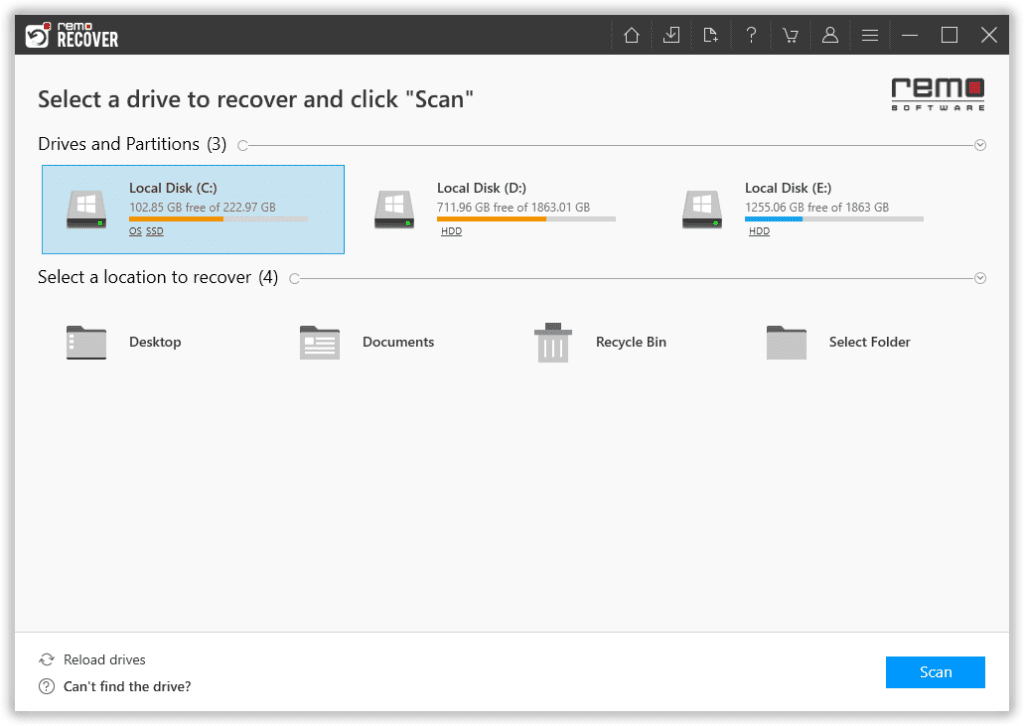
- Launch the software and select the Maxtor hard drive from which you want to recover your lost data. Click the "Scan" button to initiate the process.
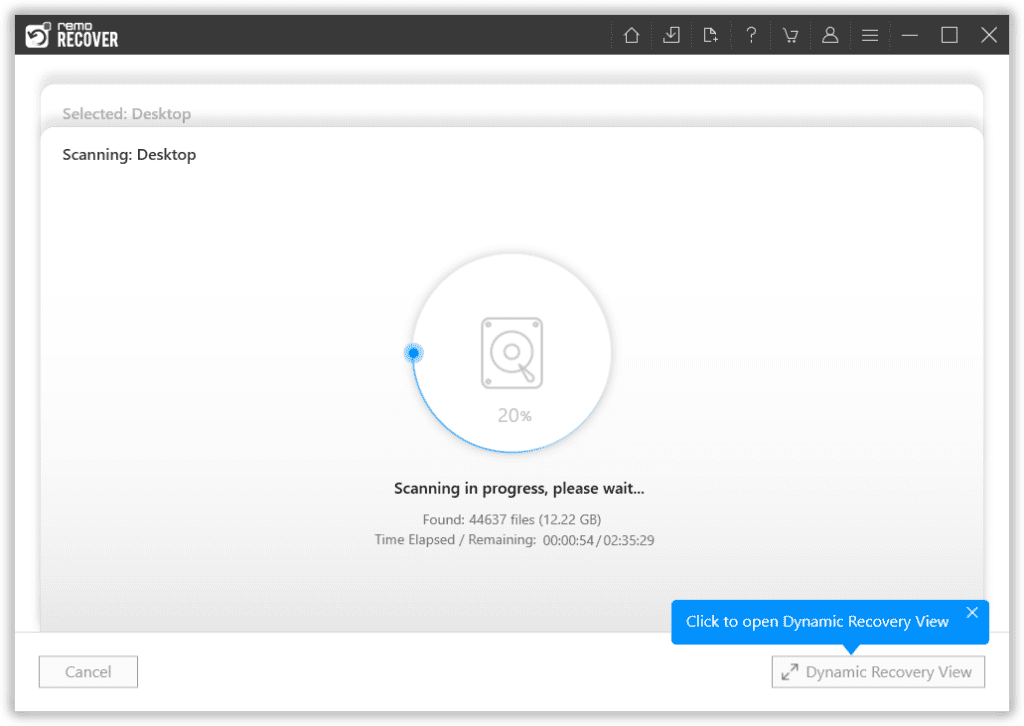
- The tool will begin with a Quick Scan and, upon completion, automatically proceed to a Deep Scan. This Deep Scan will analyze your Maxtor drive sector by sector to maximize data recovery.
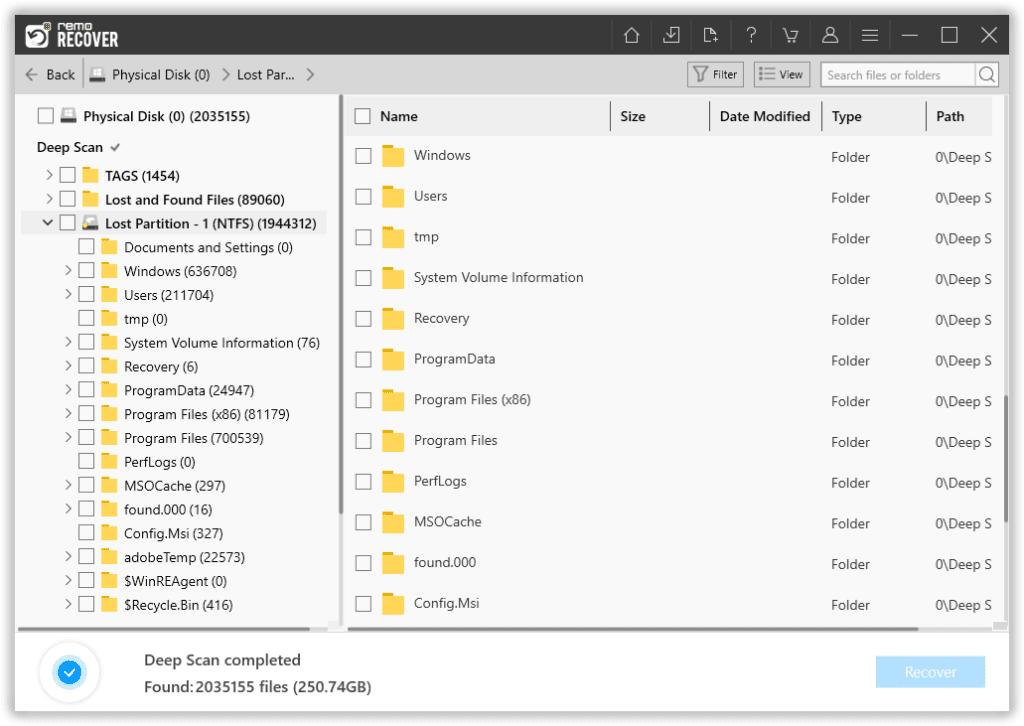
- Once the scan process is finished, the tool will present your data in the "Lost and Found" folder or a "Lost Partition" folder.
- You can preview the recovered files for free using the built-in Preview feature. Alternatively, you can preview the files using the Dynamic Recovery View during scanning.
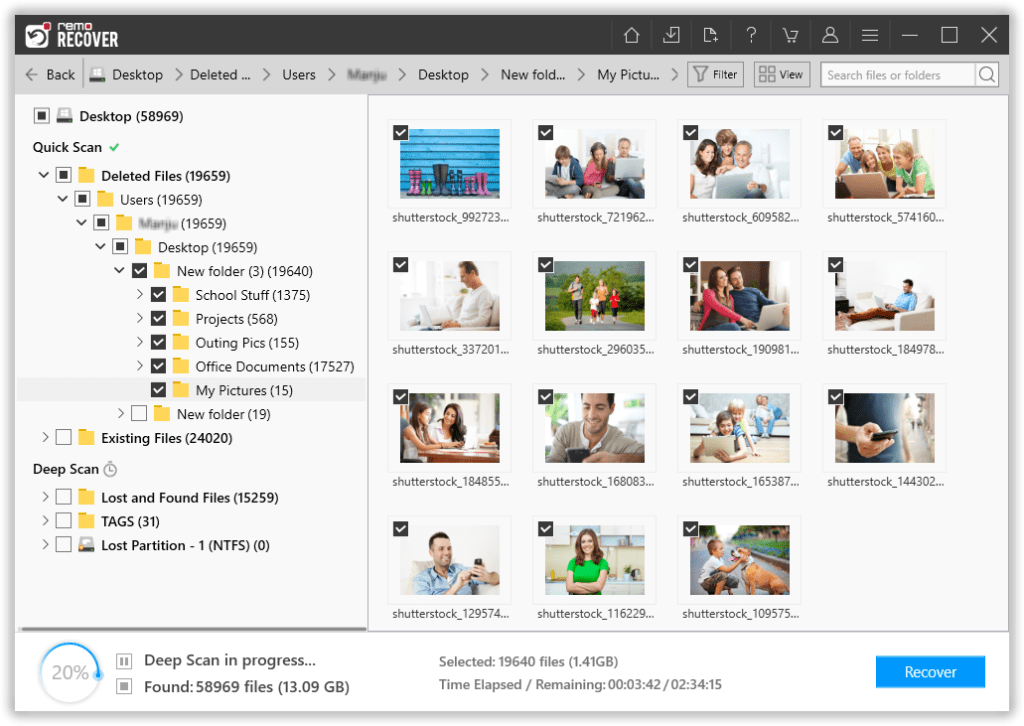
- After verifying the recovery results, select the files you wish to recover and click the "Recover" button to save them to a secure location of your choice.
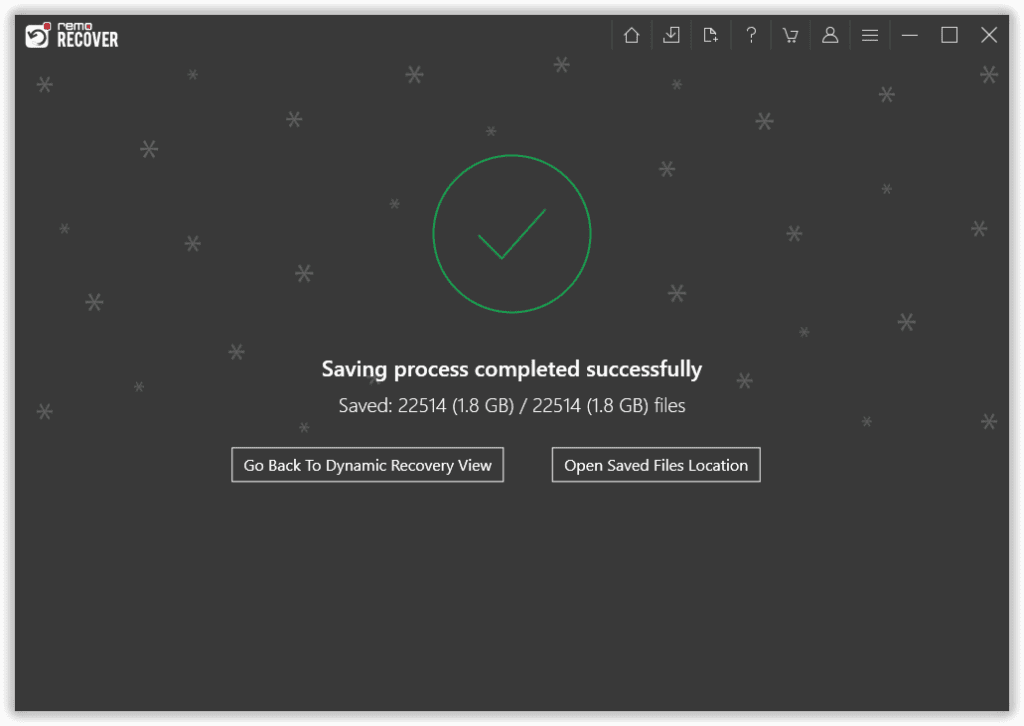
Note: It is highly recommended not to save the recovered files on the same drive to avoid overwriting data.
Method 6: Take Assistance of Data Recovery Service Centers
When all else fails and software solutions fall short, turning to a local data service center is wise. Here's what to consider:
- Choose a reputable service center known for data recovery expertise.
- Research typical data recovery costs to ensure you agree with the quoted price.
- Confirm the service center operates under a policy where you don't pay if they can't recover your data.
- Opt for a center that's conveniently located for easier access.
- Look for customer reviews and testimonials to gauge their track record.
- Ensure the service center follows stringent data security measures to protect your information.
Considering these factors, you'll be well-prepared to seek professional help recovering data from your Maxtor hard drive.
Preventive Measures to Safeguard Your Maxtor Hard Drive
- Handle With Care: Always carefully handle your Maxtor hard drive to prevent physical damage. Avoid dropping it or subjecting it to sudden shocks.
- Regular Backups: Implement a robust backup strategy. Regularly back up your data to an external source or cloud storage to mitigate data loss in case of drive failure.
- Use Antivirus Software: Protect your Maxtor hard drive from malware by installing reputable antivirus software. Regularly update and scan your drive for potential threats.
- Keep Your Drive Cool: Ensure that your Maxtor hard drive operates at an optimal temperature. Avoid placing it in confined spaces or near heat sources.
Conclusion
Maxtor's external hard drives provide excellent storage solutions. However, they are susceptible to unexpected data loss, damage, or corruption. Following some best practices, including regular backups and ensuring a stable power supply to prevent irreversible data loss, is crucial to safeguard your data.
If you think your files were permanently lost from your Maxtor external hard drive, consider using a reliable, professional hard drive data recovery tool like Remo Recover to rescue your valuable data.