Robocopy stands for robust file copy. Developed by Microsoft for the Windows operating system, Robocopy is a command-line tool. Mainly designed and created for copying, mirroring, and transferring files, folders, and directories between local directories or between different computers on a network.
This utility was initially included in (Windows NT 4.0) Resource Kit Tools, which is an extensive collection of useful utilities and other vital tools that were designed to help the System administrators and other pro users to help them effectively maintain and manage Windows systems. Since then, the tool has been a standard utility in all Windows OS and Windows Server Operating System versions, including Windows XP and Vista and all versions of Windows Server after the Windows Server 2008 version.
Though the tool is often used for backup and syncing tasks, thousands of Windows users complain that the tool has deleted some of their vital files from the destination folder.
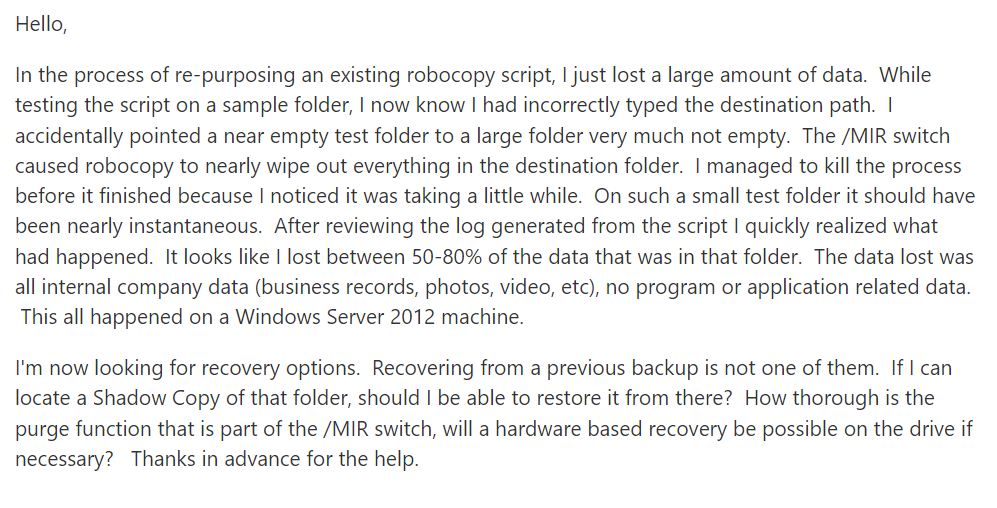
If you are one of the thousands of Windows users who have lost some of their important files after using the Robocopy/MIR command, then worry not. This comprehensive article will guide you through a sure-shot solution to recover files deleted by robocopy/mir command.
So without wasting any more, let’s fire!!!
Table of Contents:
- How To Recover Robocopy Deleted Files?
- How Do You Lose Files After Using Robocopy/MIR Command?
- How To Protect Your Crucial Files From Getting Deleted By the Robocopy/MIR Command?
How To Recover Robocopy Deleted Files?
The answer is using specialized Robocopy/MIR file recovery software such as Remo File Recovery, a potent tool guaranteed to recover files deleted, missing, and lost after using the Robocopy/MIR command in Command Prompt or Powershell.
How can Remo help you with Robocopy/MIR File Recovery?
- Remo’s mighty algorithms forage deep into the Destination folder to recover more than 500 types of files.
- Remo’s intuitive and simple user interface makes the tedious process of Robocopy deleted file recovery absolutely easy and straightforward.
- Remo Recover is a feature-rich tool to make anyone a data recovery expert; features like the Advanced filter option quickly sort and filter files so that you can easily find the files that you want to recover, and the Preview option lets you preview the recovered files, ensuring that you recover the right files.
- The tool comes with our industry-leading support assistance if you face issues during the Robocopy folders and file recovery process.
- Remo Recover is compatible with all the newer and older versions of Windows, including Windows 11 and 10, as well as Windows XP and Vista. As well as all versions of Windows Server OS.
- Bonus Reason: Remo is an absolutely free-to-try software. You are only required to pay when you are completely satisfied with the recovery process.
Download Remo File Recovery Software now and start the Windows Robocopy deleted file recovery process.
Steps To Recover Files Purged by Robocopy/MIR Command
Step 1: Download and install the Remo Robocopy File Recovery tool on your Windows system.
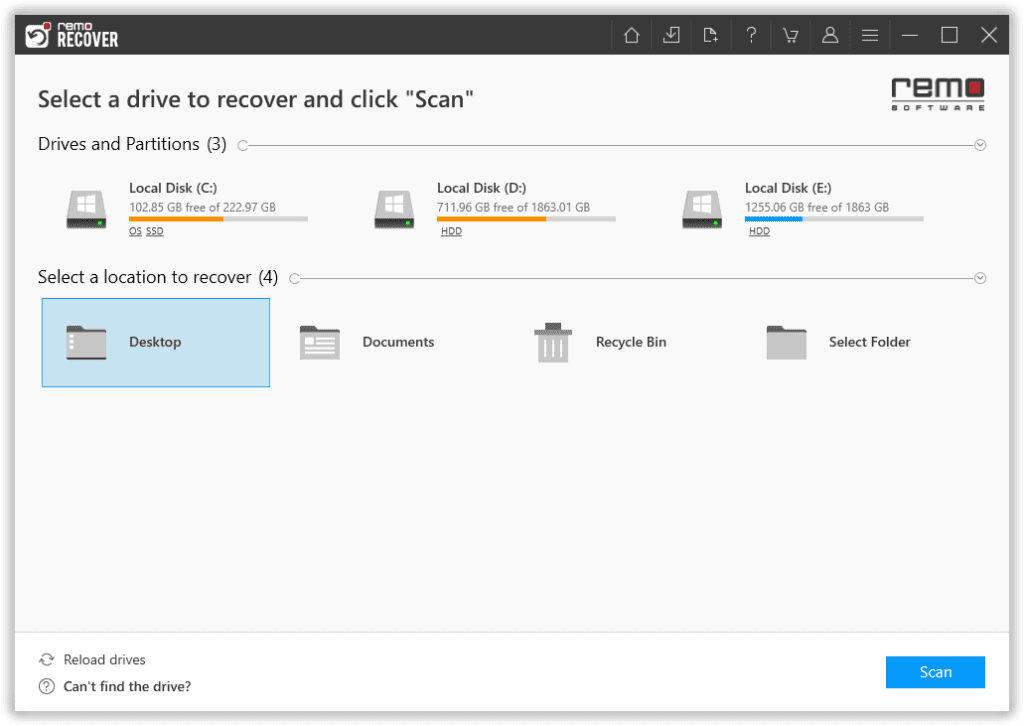
Step 2: Launch the tool, select the drive or the folder where you have saved the destination directory, and click the Scan button.
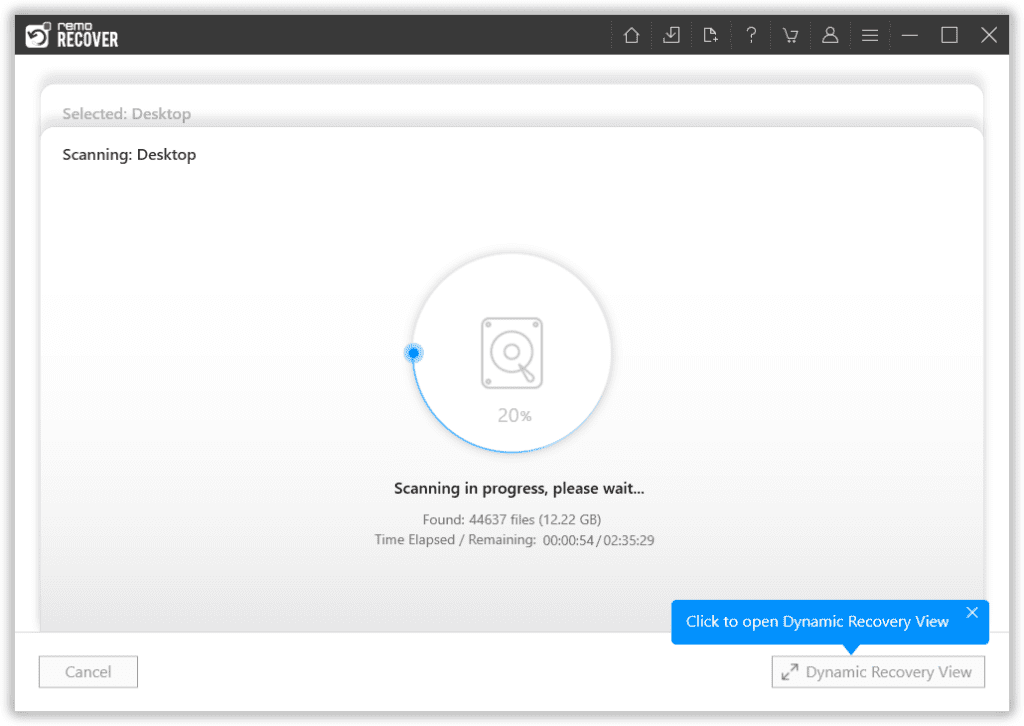
Step 3: Remo will start the scanning process. You can make use of the Dynamic Recovery View option to look at all the recovered files that Remo has recovered so far.
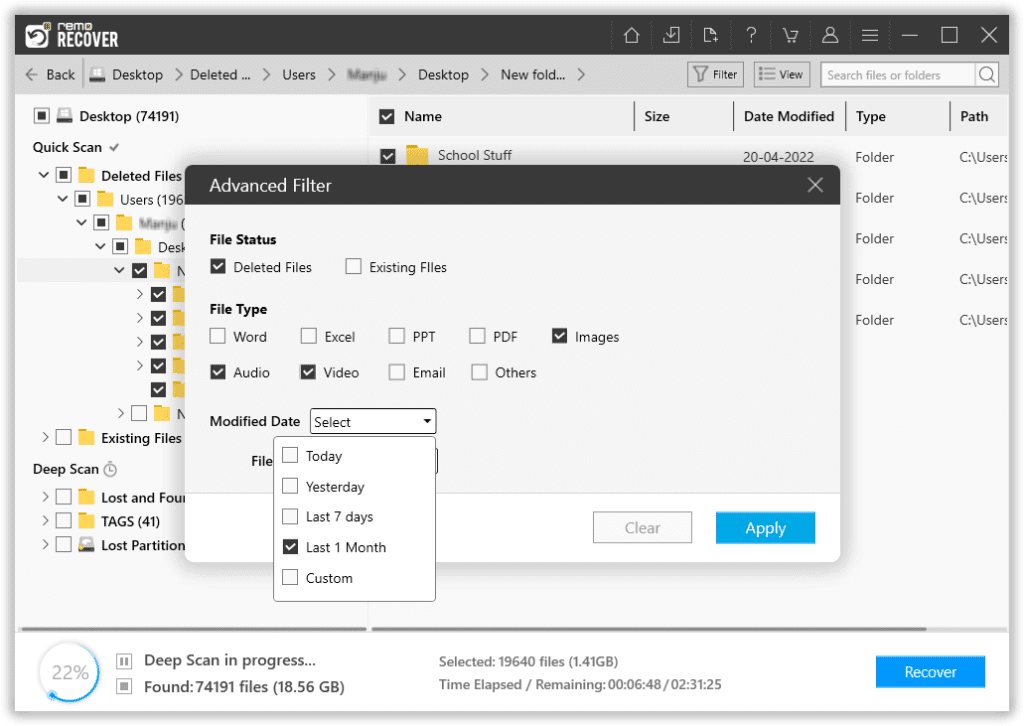
Step 4: Upon completion of the entire scanning process, Remo will display a list of all the recovered files. You can use the Advanced Filter option to sort, filter, and find various file(s).
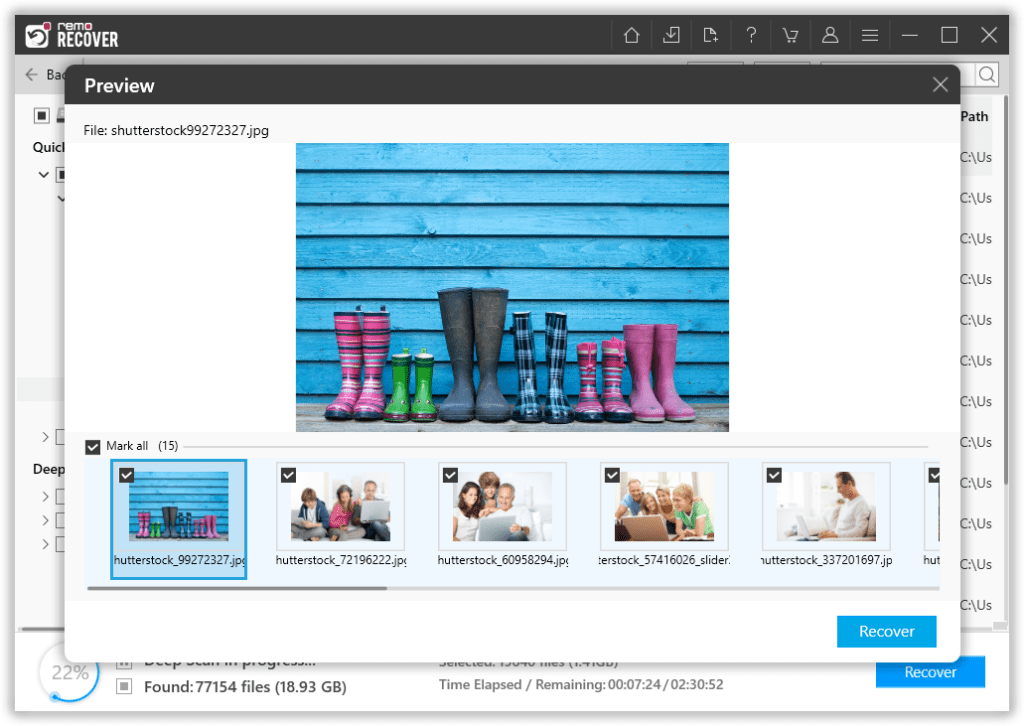
Step 5: Double-click on any recovered files that were earlier deleted after using the Robocopy command to Preview them.
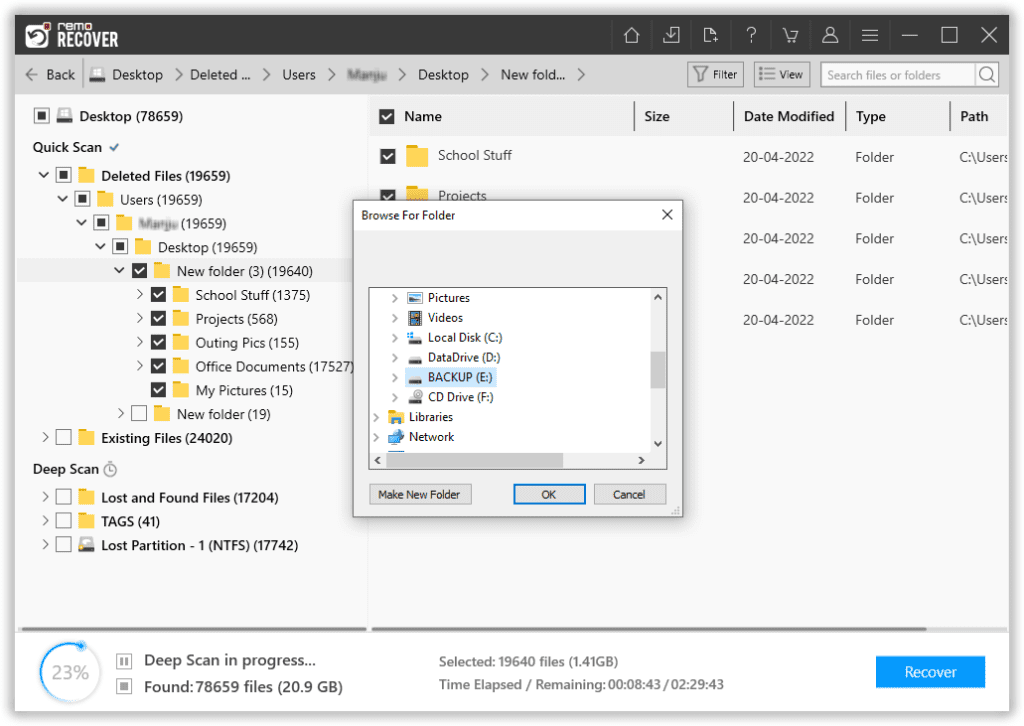
Step 6: Select the files and folders that you want to recover. Click on the Recover button, and the tool will ask you to provide a location to save the recovered Robocopy files.
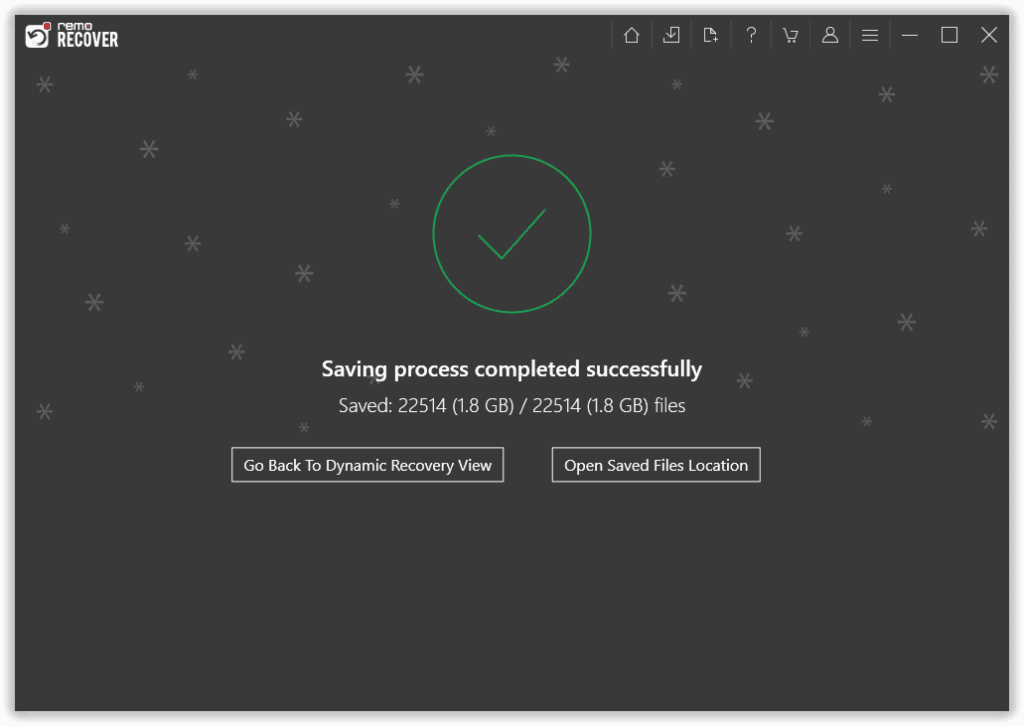
Remo has successfully retrieved the deleted robocopy files and also saved them in the desired location of your choice.
I am sure by now you have safely recovered robocopy files using Remo. Understanding why you lose your files after using the MIR command is also important.
How Do You Lose Files After Using Robocopy/MIR Command?
The Robocopy/MIR Command is used to “mirror” the original directory, known as the “Source directory,” to the backup copy directory, known as the “Destination directory.”
When you use the Robocopy/MIR command for the first time to create a backup of the original files, it will replicate the exact structure of the directory if you make any changes in the original directory, such as deleting files and folders. And later, when you run the /MIR command. The tool will also mirror the changes made in the original directory and reflect those changes in the destination directory by deleting the destination files; this process is called purging (deleting files and folders that no longer exist in the source directory).
The main idea behind MIR (mirroring command) is to ensure that the Source and Destination directories stay in sync.
Note: The files and folders that Robocopy/MIR command deletes gets permanently deleted from your system. Therefore, it is extremely crucial for you to act quickly and start the robocopy deleted file recovery process before you lose those files forever.
Suppose you have manually taken a copy of the original files and saved it on a Cloud or any external storage device. In that case, we recommend restoring the original files' backup copies. You can refer to this article to learn more about other manual solutions for recovering files from Windows.
How To Protect Your Crucial Files From Getting Deleted By the Robocopy/MIR Command?
By default, Robocopy will copy all the files in the Original Directory, and the MIR command is used to mirror the Original Directory. So any changes made in the Source directory will also reflect in the Destination directory.
But unfortunately, most Windows Robocopy users are completely unaware of the fact that the tool also lets you create and set different rules for backing up and syncing. You can now decide which files you want to include (based on certain file attributes), exclude some files (based on file size), and copy only new or changed files without bothering about old and unchanged files.
Conclusion:
Here we end our discussion where we have explained how to recover files deleted by the Robocopy/MIR command. We have discussed a brief history of the Robocopy tool and have also explained why so many Windows users lose some of their vital files and folders. Later on, we also discussed about a proven solution to recover the deleted robocopy files.
Hope you have found this article on Robocopy file recovery helpful.